As a personal finance writer at WealthSure Lab, I've spent years dissecting budgets, optimizing investments, and sharing strategies for financial freedom. My journey included paying off a substantial $50,000 in debt over three intense years, meticulously tracking every dollar of my portfolio. This discipline taught me the immense value of preparation and persistence – lessons that unexpectedly proved invaluable when I faced a completely different kind of financial challenge: my first homeowners insurance claim after a devastating storm.
Most of my writing focuses on proactive financial planning. But life, as it always does, throws curveballs. In August 2021, a powerful hurricane tore through my region, leaving a trail of destruction, including significant damage to my roof. Suddenly, I wasn't just tracking my 401(k) or optimizing my credit card rewards; I was navigating the complex, often frustrating, world of insurance claims. This wasn't a theoretical exercise; it was my home, my biggest asset, on the line.
My goal with WealthSure Lab is always to provide actionable, real-world advice based on my own experiences. So, while I’ve never written about storm damage before, I’m sharing my detailed account of filing my first-time storm damage homeowners insurance claim process. I’ll walk you through every step, every number, every frustrating phone call, and every moment of relief, so you can be better prepared if you ever find yourself in a similar situation.
Key Takeaways from My First Homeowners Insurance Claim
- Know Your Policy Inside and Out: Before disaster strikes, understand your deductible, coverage limits (ACV vs. RCV), and specific storm exclusions.
- Document Everything Meticulously: Photos, videos, dates, times, names, and notes from every conversation are your best friends.
- Get Multiple Independent Estimates: Do not rely solely on the insurance adjuster's initial assessment or estimate. Seek 3+ licensed contractors.
- Be Prepared to Negotiate and Advocate: The first offer might be low. Don't be afraid to push back with documented evidence.
- Patience and Persistence Are Crucial: The process is rarely quick or straightforward. Expect delays and be ready for consistent follow-up.
- Understand the Role of Your Mortgage Lender: If you have a mortgage, they will likely be a payee on your claim checks, adding a step to the process.
Disclaimer: I am a personal finance writer, not a licensed insurance agent, adjuster, or legal professional. The information shared in this article is based solely on my personal experience and should not be construed as professional insurance, legal, or financial advice. Insurance policies vary widely, and regulations differ by state. Always consult with your insurance provider, a qualified insurance professional, or legal counsel for advice specific to your situation.
The Calm Before the Storm (and the Panic After)
My home, a modest single-family house in suburban Florida, built in 1998, had weathered its fair share of tropical storms. I always felt prepared, maintaining a robust emergency fund – a habit instilled during my debt payoff journey – and keeping my homeowners insurance policy from State Farm up to date. I even reviewed it annually, checking my dwelling coverage (Coverage A) of $350,000 and my personal property coverage (Coverage C) of $175,000. My deductible for windstorm damage was $2,500, a figure I knew well.
Then came Hurricane Ida, making landfall in Louisiana in late August 2021, but its outer bands brought severe wind and rain to my area on August 29th. The storm felt different; the wind howled with an intensity I hadn't experienced in years. I remember sitting in my living room, watching the rain lash against the windows, hearing what sounded like heavy thuds on the roof. My heart sank. I had a gut feeling this wasn't just a downed branch.
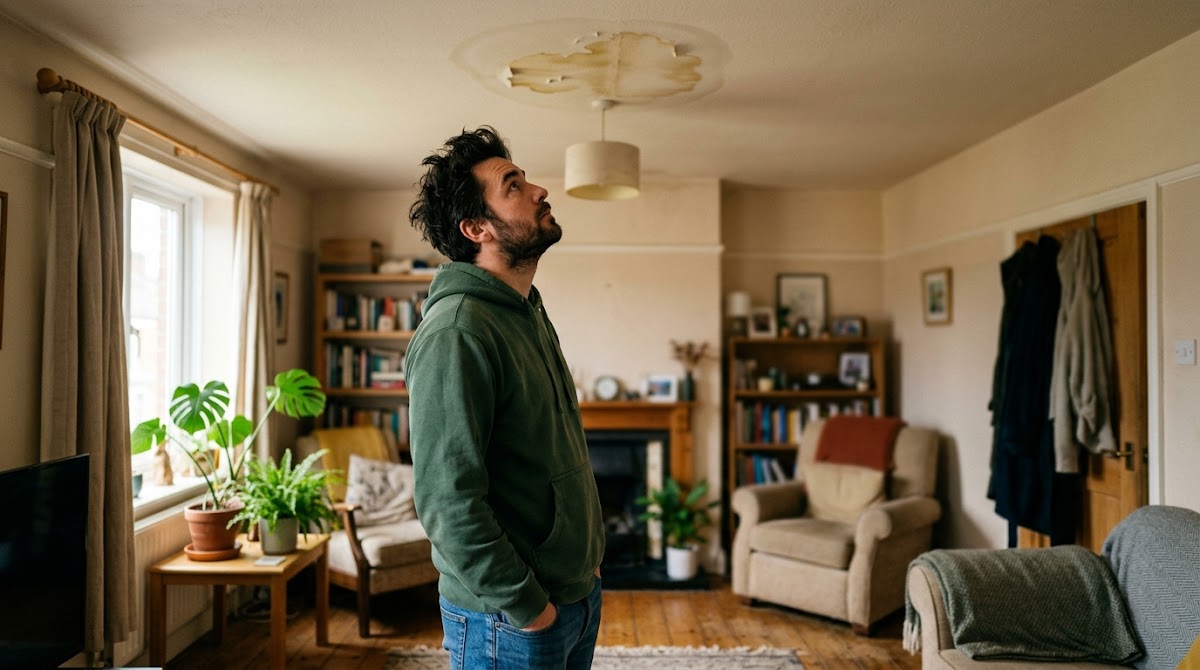
The next morning, as soon as it was safe, I stepped outside. The street was littered with debris, and a neighbor's fence lay mangled. My own yard had a scattering of small branches, but my eyes immediately went to the roof. From the ground, I could see several missing shingles, exposing the dark underlayment. Worse, a section near the chimney looked visibly warped. Inside, a faint, yellowish water stain had begun to bloom on the ceiling of my guest bedroom. The initial feeling was a mix of dread and overwhelm. "What now?" I muttered to myself, my meticulous financial planning momentarily overshadowed by the raw reality of physical damage.
My First Step: Understanding My Homeowners Policy
Before even thinking about calling State Farm, I did something crucial: I pulled out my physical policy documents and logged into my online account. This wasn't the first time I'd reviewed it, but this time, it was with a sense of urgency and purpose. I specifically focused on the "Perils Insured Against" and "Exclusions" sections, along with the "Deductibles" schedule.
My policy clearly stated a "Windstorm or Hail" deductible of $2,500, which was higher than my standard "All Other Perils" deductible of $1,000. This was an important distinction. I also confirmed my dwelling coverage was Replacement Cost Value (RCV), not Actual Cash Value (ACV). This meant that after repairs were completed, the insurance company would pay the full cost to replace the damaged property with new materials, up to the policy limits, after deducting depreciation initially paid out in the ACV check. This was a huge relief, as ACV would only pay for the depreciated value of the old roof, leaving me with a much larger out-of-pocket expense.
Misconception #1: All damage is covered equally. Many homeowners assume their deductible is always the same, or that all types of damage are treated identically. In reality, many policies, especially in storm-prone areas, have separate, often higher, deductibles for specific perils like wind, hail, or hurricanes. Always verify these details in your policy documents. Knowing this upfront helped me mentally prepare for the out-of-pocket cost I would incur.
Documenting the Damage: My Photo & Video Strategy
My next immediate step, even before calling State Farm, was to thoroughly document the damage. This is where my "track every dollar" mentality extended to tracking every detail. I grabbed my phone and started taking pictures and videos.
- Date and Time Stamp: I made sure my phone's camera settings included date and time stamps. This provides undeniable proof of when the damage was observed.
- Comprehensive Coverage: I started with wide shots of my house to show the overall context, then moved to close-ups. I took 47 distinct photos of the roof, focusing on every missing shingle, every lifted edge, and the warped section near the chimney. I also captured the debris scattered around the yard that clearly came from the roof.
- Interior Damage: Inside, I took 12 photos of the water stain on the guest bedroom ceiling, showing its progression and size. I even used a tape measure to show its dimensions, annotating the photos with notes like "Water stain, approximately 18 inches x 12 inches, directly above window."
- Video Walkthrough: I recorded a continuous video walkthrough of the exterior and interior, narrating what I was seeing. "Here's the west side of the roof, you can clearly see three rows of shingles completely gone. Moving inside to the guest bedroom, this is the water damage I mentioned..." This provided a dynamic, undeniable record.
This meticulous documentation, which took me about an hour and a half, proved to be one of the most critical steps in my entire claim process. It provided objective evidence that was invaluable later on.
Initiating the Claim: My Call to State Farm
With my policy reviewed and damage thoroughly documented, I felt ready to make the call. On August 30, 2021, at approximately 9:30 AM EST, I dialed State Farm's claims hotline. I had my policy number, the date of the storm, and my detailed notes in front of me.
The call was answered by a polite representative named Sarah. I remember her asking, "Thank you for calling State Farm claims, how can I help you today?"
I calmly explained, "Hi Sarah, my name is Alex Chen, and I need to file a homeowners insurance claim for storm damage sustained yesterday, August 29th, from Hurricane Ida's outer bands. I have visible roof damage and some interior water staining."
Sarah was efficient. She asked for my policy number, confirmed my address, and then asked for a brief description of the damage. I reiterated, "Missing shingles, a visibly warped section of the roof, and a water stain in the guest bedroom ceiling." She then informed me that a claim had been initiated and provided me with a claim number: #SF-2021-08-30-001. This number became my constant reference point.
She explained the next steps: "An adjuster will be assigned to your claim and will contact you within 24-48 business hours to schedule an inspection. In the meantime, please take reasonable steps to prevent further damage, like tarping the roof if it's safe to do so." I noted her advice, though climbing onto my damaged roof didn't feel safe to me at the time.
The Adjuster Visit: A Deep Dive into Inspection
True to Sarah's word, two days later, on September 1st, I received a call from an independent adjuster, Mark from "Independent Adjusting Solutions," who had been assigned by State Farm. He was professional and scheduled the inspection for September 3rd at 10:00 AM.
For the visit, I made sure all my documentation was organized. I had my photos and videos ready on my tablet, printed copies of my policy's relevant sections, and a notepad for taking notes. When Mark arrived, I greeted him and offered him a bottle of water.
He introduced himself and explained his process. "My job is to assess the damage, determine the cause, and prepare an estimate for the repairs," he stated. I walked him around the exterior first, pointing out the missing shingles and the warped section. He then pulled out his ladder and spent about 45 minutes on the roof, taking his own photos and measurements. I watched him carefully, observing his focus on specific areas. He noted, "Looks like you've got some significant wind lift here, Alex, and definitely some missing granules on these surrounding shingles."
Inside, I showed him the water stain. He used a moisture meter to check the ceiling and walls. "The moisture reading here is elevated, indicating active or recent water intrusion," he confirmed, which was reassuring to hear from an objective source.
Throughout the inspection, I engaged him with questions. "Based on what you're seeing, Mark, does this look like a full roof replacement, or can it be patched?" I asked. He responded, "It's too early for me to say definitively, but with the extent of shingle loss and the age of the roof, a full replacement is certainly a strong possibility." This conversation was critical for understanding the scope of damage from an expert's perspective.
Misconception #2: The adjuster is always on your side. While adjusters are typically professional, it's important to remember they are employed by or contracted by your insurance company. Their primary role is to assess damage and ensure the claim aligns with policy terms, but their initial assessment may not always fully capture the extent of damage or the true cost of repairs. This became very clear to me later in the process.
Navigating the Repair Estimates: My Contractor Vetting Process
Following the adjuster's visit, I knew I couldn't simply wait for State Farm's offer. I needed independent verification of the repair costs. This is where my "track every dollar" discipline kicked in again. I immediately started calling local, licensed, and insured roofing contractors. My goal was to get at least three detailed quotes for a full roof replacement, assuming that would be the outcome.
I contacted "Roofing Solutions Inc.," "Premier Roofers LLC," and "Elite Home Exteriors." Each company sent out a representative within a week. I made sure to explain to each contractor that I was filing an insurance claim and needed an estimate that detailed all necessary repairs, materials, and labor, suitable for submission to my insurance company. I asked them to specifically look for collateral damage that might not be immediately obvious, like damaged flashing or gutters.
Here’s a comparison of the quotes I received:
| Contractor | Total Estimated Cost | Shingle Type & Quality | Warranty (Workmanship) | Estimated Timeline |
|---|---|---|---|---|
| Roofing Solutions Inc. | $18,000 | GAF Timberline HDZ (Architectural) | 10 years | 2-3 days |
| Premier Roofers LLC | $17,200 | Owens Corning Duration (Architectural) | 7 years | 3-4 days |
| Elite Home Exteriors | $20,500 | CertainTeed Landmark Pro (Architectural) | 12 years | 3-5 days |
I spent time discussing each quote. With Roofing Solutions Inc., their representative, David, walked me through their process, explaining, "We'll strip down to the decking, inspect for rot, replace any damaged plywood, install new underlayment, and then the GAF Timberline HDZ shingles. We also include new flashing around the chimney and vents." This level of detail gave me confidence.
The Struggle: My First Major Hurdle – The Lowball Offer
About ten days after the adjuster's visit, on September 13th, I received State Farm's initial offer. It was a digital estimate, accompanied by a letter. The total estimated repair cost was $8,500, less my $2,500 deductible, for a payout of $6,000. My heart sank. I felt a wave of frustration and disbelief wash over me. I remember thinking, "That wouldn't even cover half the roof! This is completely unrealistic."
My mistake here was a common one: initially trusting the first adjuster's estimate without enough external validation. While I had my contractor quotes, I hadn't yet fully processed the potential disparity. The adjuster's estimate was based on patching a few areas, not a full replacement, and used lower-grade materials than what was originally on my roof, let alone what modern building codes would require for a full replacement.
This initial offer was a major hurdle. I felt a knot in my stomach, realizing the battle was just beginning. I had done my homework, but the insurance company's initial assessment was a stark contrast to my findings.
The Hardest Part: The Back-and-Forth Negotiation
This phase was, without a doubt, the hardest part of the entire process. I spent the next three weeks in a constant back-and-forth with State Farm. My second mistake was not being aggressive enough in my initial response. I sent an email politely stating my disagreement and attaching my three contractor quotes. I expected a quick revision.
Instead, I received a templated response, essentially reiterating their original estimate. This forced me to pivot my strategy. I realized I needed to be more assertive and provide a clear, evidence-based argument for a full roof replacement.
My actions included:
- Multiple Phone Calls: I started calling the claims department daily. I always asked for the claims manager, Mr. Henderson, by name. When I finally reached him on September 20th, I stated firmly, "Mr. Henderson, I have received three independent estimates from licensed contractors, all of whom agree that a full roof replacement is necessary due to the extent of the wind damage and the age of the roof. My contractor's estimate for a full roof replacement is $18,000, and your offer of $8,500 leaves a $9,500 gap that is simply unrealistic for the repairs needed."
- Supplementary Documentation: I wasn't just sending quotes. I asked "Roofing Solutions Inc." to provide a detailed report outlining why a full replacement was necessary, including photos from their inspection that showed granule loss on surrounding shingles, which indicated widespread impact beyond just the missing ones. They even cited local building codes that might require a full replacement if a certain percentage of the roof was damaged.
- Citing My Policy: I referenced my policy's RCV clause and argued that their estimate did not meet the "like kind and quality" replacement standard.
The stress during this period was palpable. I felt like I was constantly fighting for what was fair. Each phone call was emotionally draining, and waiting for responses felt like an eternity. There were moments of doubt, where I wondered if I should just accept the lower offer and pay the difference myself. But then I'd remember my meticulous debt payoff, my dedication to every dollar, and I'd find the resolve to push back again.
This negotiation took 17 days of active effort, including 8 phone calls and 4 email exchanges. It was a masterclass in persistence.
The Breakthrough: My Settlement and the Payout Process
Finally, on October 7th, 2021, I received an email with a revised offer. My heart pounded as I opened it. State Farm had agreed to a full roof replacement. The new estimate was for $17,500, based on Replacement Cost Value (RCV).
The feeling was immense relief, a profound sense of validation. All those phone calls, all that documentation, all that persistence had paid off. It wasn't the full $18,000 I was quoted by my preferred contractor, but it was close enough that I felt confident moving forward. The difference of $500 was something I was willing to absorb, possibly even upgrading a small feature of the roof.
The payout process itself involved two checks:
- Actual Cash Value (ACV) Check: State Farm sent an initial check for $15,000, which was the RCV ($17,500) minus the depreciation holdback (typically 10-20% for roofs, in my case, $2,500) and my $2,500 deductible. So, $17,500 (RCV) - $2,500 (depreciation) - $2,500 (deductible) = $12,500. This check arrived on October 15th.
- Mortgage Lender Involvement: Because I have a mortgage with Wells Fargo, their name was also on the check. This meant I couldn't just deposit it. I had to send the check to Wells Fargo, along with State Farm's settlement letter and my chosen contractor's estimate. Wells Fargo then endorsed the check and sent it back to me, sometimes directly to the contractor, sometimes in installments as work progressed. This added another 5-7 business days to the process, a minor inconvenience but an important step for mortgage holders.
- Replacement Cost Value (RCV) Check: After the repairs were completed and I submitted proof (final invoice from the contractor, photos of the new roof), State Farm released the depreciation holdback of $2,500. This final check arrived on November 20th.
In total, I received $15,000 from State Farm ($12,500 initial ACV + $2,500 RCV depreciation). My total out-of-pocket cost was my $2,500 deductible plus an additional $500 I chose to spend to upgrade to a slightly higher-grade shingle than the base architectural shingle covered, bringing my total out-of-pocket to $3,000.
The Repair Journey: From Damaged Roof to New Shingles
With the initial ACV check in hand and the mortgage company's endorsement secured, I officially hired "Roofing Solutions Inc." for the $18,000 job. We signed the contract on October 18th, and they scheduled the work for the last week of October.
The actual repair process was surprisingly swift and efficient. The crew arrived on October 25th, and they were a well-oiled machine. They covered my landscaping, stripped the old roof, inspected the decking (finding no significant rot, thankfully), and installed the new underlayment and shingles. The job was completed in two days, by October 26th.
I was present during the entire process, regularly checking on their progress and ensuring the work matched the detailed estimate. I took "before and after" photos of the roof, which served as my proof of repair. Once the job was complete, I paid Roofing Solutions Inc. the remaining balance of their invoice (minus the initial deposit I had paid from the ACV check). I submitted the final paid invoice and my "after" photos to State Farm to trigger the final RCV payout.
The result was a secure home, a beautiful new roof, and, most importantly, immense peace of mind. My home, my biggest asset, was protected again. The feeling was not just relief from the financial burden, but a deep satisfaction from successfully navigating a challenging process.
Lessons Learned from My First Storm Damage Claim
This experience, while stressful, was an invaluable education. Here are the core lessons I took away:
- Know Your Policy Inside Out: This is non-negotiable. Before any event, understand your deductibles, coverage limits (ACV vs. RCV), and specific exclusions. Don't wait until disaster strikes. The Consumer Financial Protection Bureau (CFPB) offers great resources on understanding these complex documents.
- Document EVERYTHING Meticulously: Photos, videos (with date/time stamps), notes from every conversation (date, time, person's name, summary of discussion), emails, and contractor estimates. This evidence is your strongest advocate.
- Get Multiple Independent Quotes: Never settle for just the insurance adjuster's estimate. Get at least three detailed quotes from licensed, reputable contractors. This gives you leverage and a realistic understanding of repair costs.
- Be Prepared to Negotiate and Advocate: The insurance company's initial offer is often not their final offer. Be firm, polite, and persistent. Present your evidence clearly and consistently.
- Patience and Persistence Are Key: The claims process is rarely fast. Expect delays, follow up regularly, and don't get discouraged by initial setbacks. My claim took from August 30th to November 20th to fully resolve.
- Understand the Role of Your Mortgage Lender: If you have a mortgage, your lender will likely be a payee on your claim checks. Factor in the extra time and steps required to get their endorsement.
- Consider a Public Adjuster (Though I Didn't Use One): While I handled my claim directly, I learned that for very large or complex claims, a public adjuster (who works for *you*, not the insurance company) can be beneficial. They typically charge a percentage of the settlement, but their expertise can often lead to a higher payout, as highlighted by Investopedia's explanation of public adjusters. For my claim, I felt confident handling it myself, but it's a resource worth knowing.
This experience reinforced my belief that financial literacy extends beyond investments and savings. It includes understanding and leveraging the protective mechanisms we pay for, like homeowners insurance. It was a challenging journey, but one that ultimately strengthened my financial resilience and provided invaluable real-world knowledge.
FAQ: Your First-Time Homeowners Insurance Claim Questions Answered
Q1: How long does it typically take to resolve a storm damage claim?
Based on my experience, from initial filing to receiving the final RCV check, my claim took about 12 weeks (August 30th to November 20th). However, this can vary significantly depending on the extent of the damage, the responsiveness of your insurance company, the number of claims they are processing after a major event, and any negotiation required. Some claims can resolve in a few weeks, while others might take months.
Q2: Do I need to get multiple contractor quotes, or can I just use the insurance company's estimate?
While you are not legally required to get multiple quotes, I highly recommend getting at least three independent estimates from licensed and insured contractors. My experience showed that the insurance company's initial estimate can be significantly lower than the actual cost of repairs. Multiple quotes provide you with leverage during negotiation and ensure you get a fair and comprehensive repair.
Q3: What if my mortgage company is on the insurance check?
If you have a mortgage, your lender will almost certainly be listed as a payee on your insurance claim check. This is because they have a financial interest in your property. You will typically need to send the check, along with supporting documentation (like the insurance settlement letter and contractor's estimate), to your mortgage company for endorsement. They may hold the funds in an escrow account and release them in installments as repairs are completed, or they may endorse the check and send it back to you. Contact your mortgage company immediately to understand their specific process.
Q4: Will my homeowners insurance premiums go up after filing a storm damage claim?
It's possible, but not guaranteed. Factors influencing premium increases include the type and severity of the claim, your claims history, and your location. A single storm damage claim, especially for a widespread event like a hurricane, might not significantly impact your individual premiums as much as multiple claims for smaller issues. However, insurance companies do re-evaluate risk, and an increase is a potential outcome. It's worth discussing with your agent after the claim is settled.
Q5: What's the difference between Actual Cash Value (ACV) and Replacement Cost Value (RCV)?
Actual Cash Value (ACV) pays for the cost to replace the damaged property minus depreciation. For example, if your 10-year-old roof had a 20-year lifespan, ACV would pay you half the cost of a new roof. Replacement Cost Value (RCV) pays for the full cost to replace the damaged property with new materials of like kind and quality, without deduction for depreciation, up to your policy limits. Most homeowners policies for dwelling coverage are RCV, but it's crucial to verify this in your policy. My policy had RCV, meaning I received the depreciated amount initially, and then the depreciation holdback after repairs were completed.
Q6: When should I consider hiring a public adjuster?
You might consider hiring a public adjuster if your claim is very large or complex, if you're struggling to get a fair offer from your insurance company, or if you simply don't have the time or expertise to manage the negotiation process yourself. Public adjusters work on behalf of the policyholder and typically charge a percentage (e.g., 10-15%) of the final settlement. While I didn't use one for my claim, I certainly considered it during the negotiation phase when I felt stuck. They can be a valuable resource for maximizing your payout, especially when dealing with significant losses.
Sources
- Consumer Financial Protection Bureau (CFPB). "How to read your homeowners insurance policy." https://www.cfpb.gov/about-us/blog/how-read-your-homeowners-insurance-policy/
- Investopedia. "Public Adjuster." https://www.investopedia.com/articles/insurance/09/public-adjuster.asp
Written by Alex Chen, a personal finance writer at WealthSure Lab who paid off $50,000 in debt over 3 years and tracks every dollar of my portfolio.