After meticulously tracking my finances for the past five years—a habit that helped me pay off $50,000 in debt by early 2021 and build a robust emergency fund—I genuinely believed I was ready for anything life threw my way. My budget was ironclad, my investments were diversified, and my savings accounts were healthy. Then, in late October 2022, my home in Austin, Texas, threw a curveball I hadn't fully anticipated: a burst pipe in the upstairs bathroom. Suddenly, all my financial preparedness felt theoretical as I faced my very first home insurance claim.
It was a Saturday morning, around 7:30 AM. My partner and I were just getting ready to head out for a hike when I noticed a faint dripping sound. It wasn't the usual morning sounds of the house settling; this was distinct. I followed the sound to the guest bathroom upstairs, only to find a small, but rapidly expanding, puddle forming around the base of the toilet. A quick glance under the sink revealed the horror: a hairline crack in the copper supply line, steadily weeping water onto the subfloor. My heart sank. This wasn't just a quick mop-up job; this was a plumbing emergency with potential for serious water damage.
What followed was a whirlwind of turning off the main water supply, frantic calls to plumbers, and a crash course in home insurance claims. While my financial tracking had prepared me for the cost of the deductible and potential premium increases, it hadn't prepared me for the intricate dance of documentation, negotiation, and sheer patience required to navigate the claims process. Looking back, there's so much I wish I knew before that burst pipe turned my weekend upside down. This article is my attempt to distill those hard-won lessons into a practical guide, a first time home insurance claim checklist, so you don't have to learn them the hard way.
Disclaimer: I am a personal finance writer at WealthSure Lab, and while I share my personal experiences and financial strategies, I am not a licensed insurance professional or financial advisor. The information provided in this article is for informational purposes only and does not constitute professional advice. Always consult with a qualified insurance agent or financial advisor for personalized guidance regarding your specific situation and policy. Insurance policies and laws vary by state and provider. My experiences are specific to my policy with State Farm in Texas during late 2022.
Key Takeaways for Your First Home Insurance Claim:
- Document Everything, Immediately: Photos, videos, notes, timestamps. Before and after any cleanup.
- Understand Your Policy: Know your deductible, coverage limits (ACV vs. RCV), and exclusions *before* you need to file.
- Mitigate Damage Promptly: Your policy requires you to prevent further damage, but document these efforts.
- Communicate Clearly: Keep a log of all interactions with your insurer, adjusters, and contractors. Get everything in writing.
- Be Prepared for "The Struggle": Claims can be complex and frustrating. Patience and persistence are key.
- Don't Be Afraid to Ask Questions: If you don't understand something, ask for clarification.
- Review Estimates Carefully: Ensure contractor bids cover all damages and your adjuster's estimate is fair.
The Unforeseen Disaster: My Burst Pipe Incident
Initial Discovery and Damage Assessment
That Saturday morning in late October 2022, the dripping sound was subtle at first, but it quickly escalated. Within an hour, the puddle had spread across the tile floor of the guest bathroom and was seeping under the baseboards into the adjacent hallway. My partner, bless his calm demeanor, immediately located the main water shut-off valve in our garage and turned it clockwise. The dripping stopped, but the damage was done.
My first reaction, after the initial panic, was to grab every towel we owned. I started sopping up water, pulling up area rugs, and moving furniture. This, I would later learn, was a crucial mistake – or at least, a missed opportunity for better documentation. In my haste to "mitigate damage," I didn't take enough photos or videos *before* I started cleaning. I got a few quick snaps of the puddle, but not the full scope of saturation or the exact location of the leak relative to the structure.
The plumber, "Reliable Pipes of Austin," arrived within two hours. He quickly identified the culprit: a pinhole leak in a copper pipe that had likely been slowly deteriorating for months, finally giving way under pressure. The repair itself was straightforward, costing me $380 out of pocket, which I paid immediately. The plumber confirmed that the water had likely seeped into the subfloor, potentially wicking up the drywall in the adjacent closet and hallway. This was when the gravity of the situation truly hit me: this was no longer just a plumbing fix; this was a water damage restoration project, and it was going to be expensive.
My First Time Home Insurance Claim Checklist: A Step-by-Step Guide
1. Secure the Scene and Mitigate Further Damage (Document EVERYTHING!)
This is where I learned my first hard lesson. My initial instinct to clean up was correct – you have a duty to mitigate further damage under your policy. However, my execution lacked proper documentation. Here’s what I *should* have done, and what you absolutely *must* do:
- Stop the Source: Immediately shut off the water main if it's a leak, or secure the area if it's a storm.
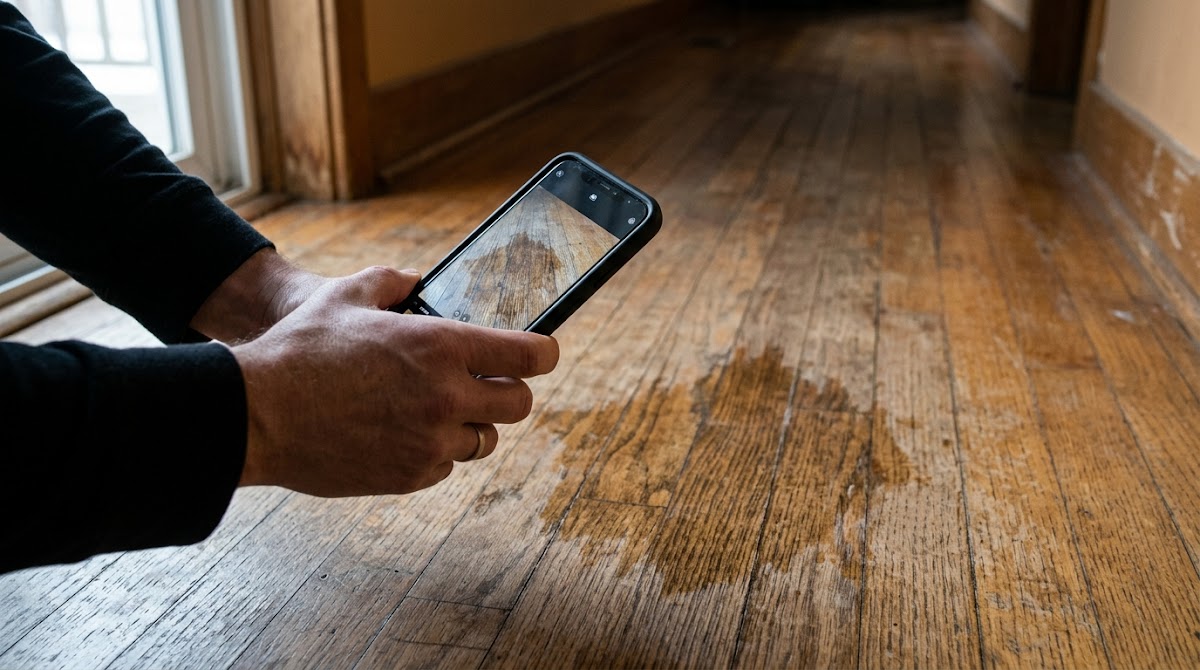
- Document Extensively, Then Clean: Before you touch anything, take dozens of photos and videos from multiple angles. Get close-ups of the damage, wide shots showing the affected areas, and even shots of the source of the problem. Narrate your videos, describing what you see, the date, and the time. This is invaluable evidence. I wish I had taken more high-resolution photos of the saturated baseboards and the initial water spread before I began my frantic towel brigade.
- Temporary Repairs: If safe, make temporary repairs to prevent further damage (e.g., tarping a damaged roof, using towels to contain a leak). Keep all receipts for these expenses. I rented a heavy-duty dehumidifier from Home Depot for $180 for the first week to try and dry out the affected areas, which was a covered expense.
- Safety First: Ensure the area is safe. Turn off electricity to affected zones if there's a risk of electrocution.
2. Contact Your Insurance Company Promptly
Once the immediate crisis was contained, I called my State Farm agent, Sarah, on Monday morning, October 30th, 2022. I explained what happened, and she connected me to the claims department. This call was crucial. When I spoke to the claims representative, Mark, he was professional but direct. "Mr. Chen," he said, "the first step is to get a claim number for your records. Then, we'll assign an adjuster. In the meantime, continue your mitigation efforts and document everything. Do you have photos and videos of the damage?" I confirmed I had some, but internally, I winced, knowing they weren't as comprehensive as they should have been.
- Have Your Policy Information Ready: Your policy number and a general understanding of your coverage.
- Be Prepared to Provide Details: Date and time of incident, cause of damage, extent of damage.
- Get a Claim Number: This is your reference for all future communications.
- Ask About Next Steps: What is the process? When will an adjuster contact you? What documentation do they need from you?
3. Meet with the Insurance Adjuster: How to Talk to Insurance Adjuster First Claim
My assigned adjuster, David, contacted me within 24 hours of my claim submission. He scheduled an on-site visit for November 2nd, 2022. This meeting is critical. This is where you present your evidence and discuss the scope of the damage.
- Be Present and Prepared: Have all your documentation (photos, videos, receipts for temporary repairs, plumber's report) organized and ready.
- Walk Them Through the Damage: Show them everything, even areas you think might be minor. Point out where the water traveled, explain the timeline.
- Ask Questions: This is your opportunity to understand what they're looking for and how they assess damage. David explained, "My job is to assess the visible damage and estimate the cost of repair or replacement based on your policy terms. We'll look at what's directly affected by the water, like the subfloor, drywall, and baseboards."
- Understand Your Policy's Specifics: Actual Cash Value (ACV) vs. Replacement Cost Value (RCV)
This was a major point of confusion for me. My policy had a mix of ACV and RCV. David explained, "For structural components like drywall and subfloor, your policy covers Replacement Cost Value (RCV), meaning we pay what it costs to replace with new materials. For personal property, like if your antique rug had been damaged, it would be Actual Cash Value (ACV), which is replacement cost minus depreciation." This distinction can significantly impact your payout. Make sure you understand how your specific policy handles both. I wish I had clarified this *before* the incident.
Here's a quick comparison:
Feature Replacement Cost Value (RCV) Actual Cash Value (ACV) Definition Pays to replace damaged property with new, similar items at current market prices, without deduction for depreciation. Pays to replace damaged property with new, similar items, but deducts for depreciation (wear and tear, age). Payout Generally higher payout, as it covers the full cost of new items. Often paid in two installments: ACV first, then the depreciation amount once repairs are complete. Lower payout, as it accounts for the item's depreciated value. Commonly Used For Structural damage (roof, walls, flooring), newer personal property. Older personal property (furniture, electronics, clothing). My Experience My damaged subfloor, drywall, and baseboards were covered under RCV. The initial payout was ACV, with the depreciation held back until repairs were verified. If my older rug had been damaged, it would have been ACV. Fortunately, it was just the structural elements.
4. Get Multiple Repair Estimates
After David's visit, he advised me to get at least two estimates from qualified contractors. This is crucial for ensuring you get a fair and accurate payout. I contacted three local water damage restoration companies. The quotes varied wildly:
- ServiceMaster Restore: $9,200 (including demolition, drying, and reconstruction)
- PuroClean: $7,800 (similar scope)
- Local independent contractor (recommended by a friend): $6,500 (but with less detailed breakdown)
I submitted the PuroClean estimate of $7,800 to State Farm, as it was detailed and seemed fair. This step felt like a mini-project management role, coordinating schedules and explaining the damage repeatedly. It was tiring, but absolutely necessary to get a realistic cost assessment.
5. Review the Adjuster's Estimate and Negotiate
Within a week of my adjuster's visit, David sent me State Farm's estimate. It came in at $6,800. This was lower than the $7,800 quote I had from PuroClean. My deductible was $1,500, meaning an initial payout of $5,300 (before any held-back depreciation). This discrepancy was a source of frustration, but I was prepared to address it.
- Compare Line by Line: Go through your contractor's estimate and the adjuster's estimate side-by-side. Look for missing items, differences in material quality (e.g., standard paint vs. moisture-resistant paint), or labor hours.
- Don't Be Afraid to Challenge: I called David back. "David," I started, "I appreciate your estimate, but I noticed it doesn't account for the specialized moisture readings and drying equipment PuroClean included, nor the specific type of baseboard replacement that matches my existing trim." He listened patiently. We discussed the differences, and he agreed to re-evaluate based on the detailed breakdown from PuroClean.
- Provide Justification: If your contractor's estimate is higher, explain *why*. Is it for specialized equipment, specific materials, or additional labor unforeseen by the adjuster?
- Get it in Writing: Confirm any agreements or changes to the estimate in writing via email.
6. The Payout and Repairs
After a bit of back-and-forth, State Farm revised their estimate to $7,800, matching PuroClean's bid. My deductible of $1,500 was applied, resulting in an initial payout of $6,300. This check arrived in mid-November 2022, about three weeks after the incident. I felt a wave of relief, knowing that the financial burden was significantly lessened. The repairs began shortly after, taking about two weeks to complete, involving drying, demolition of the affected drywall and subfloor, and then reconstruction. The final cost of the repairs was indeed $7,800, paid directly to PuroClean. Once the repairs were completed and verified by State Farm, they released the depreciation holdback, which for my structural repairs was minimal, just a few hundred dollars, bringing the total paid by the insurer to the full $6,300 (after my deductible).
The Struggle: Mistakes I Made and What Went Wrong
Despite my meticulous financial habits, my first home insurance claim was far from smooth. Here are the specific mistakes I made and the dead ends I encountered:
-
Lack of Immediate, Comprehensive Documentation: This was my biggest oversight. In the panic of discovering the burst pipe, my priority was to stop the water and clean up. I took maybe five quick, blurry photos of the puddle and the initial leak. What I *should* have done was grab my phone and record a detailed video, narrating the scene, showing the extent of the water spread, the exact location of the leak, and the condition of the surrounding materials (baseboards, drywall, flooring) *before* I touched anything. This would have provided undeniable evidence to the adjuster and streamlined the initial assessment. Instead, I had to rely more on the plumber's and restoration company's assessments for the full scope, which added an extra layer of verification.
The feeling: Frustration, knowing I could have made the process easier on myself.
-
Underestimating the Scope of "Water Damage": I initially thought it would be a simple patch-and-paint job. I significantly underestimated how insidious water damage can be. When the adjuster, David, explained that water wicks up drywall and can cause mold if not properly dried and removed, it was a wake-up call. My initial focus was on the visible puddle, not the hidden saturation. This meant that the repair estimate was much higher than I had mentally prepared for, moving from a few hundred dollars to several thousand. The cost of specialized drying equipment and mold prevention measures was an eye-opener.
The feeling: Surprise and a bit of dread as the numbers climbed.
-
Misinterpreting Policy Language on Depreciation: As mentioned, the difference between Actual Cash Value (ACV) and Replacement Cost Value (RCV) was not clear to me. My policy covered structural damage (like my subfloor and drywall) at RCV, but personal property at ACV. When the initial payout check arrived for less than the full repair estimate (after deductible), I was momentarily confused. I had to call my agent again to understand that a portion of the RCV payout is often held back until repairs are completed to ensure the money is used for its intended purpose. If I hadn't asked, I might have incorrectly assumed the insurer was short-changing me.
The feeling: Initial confusion, followed by clarity and a sense of "I wish I knew this upfront."
These struggles, while frustrating in the moment, were invaluable learning experiences. They underscored the importance of proactive education about my insurance policy and meticulous documentation.
Addressing Common Misconceptions About Home Insurance Claims
During my claim process, I encountered several widespread myths that simply aren't true:
-
Misconception #1: Filing a Claim Will Always Drastically Raise Your Premiums.
Reality: While filing a claim *can* impact your premiums, it's not a guaranteed drastic increase, especially for a single, legitimate, non-negligent incident like a burst pipe. Insurers look at several factors: the type of claim (water damage vs. liability), the cost of the claim, your claims history (multiple claims in a short period are a red flag), and even your geographic location. A single water damage claim, particularly one where you took immediate action to mitigate, might lead to a modest increase or no change at all, especially if your insurer considers it an "Act of God" or an unavoidable incident. However, repeated claims, even small ones, can signal higher risk and lead to premium hikes or even non-renewal. This is why it's crucial to only file claims for significant damage that exceeds your deductible.
My premium with State Farm saw a modest increase of about 8% ($120 annually) upon renewal in June 2023, which I considered manageable given the $6,300 payout. This wasn't the catastrophic increase I feared.
-
Misconception #2: The Insurance Company Will Handle Everything for You.
Reality: Your insurance company is there to process your claim and pay out according to your policy. However, you, the homeowner, are an active participant and advocate in the process. You are responsible for:
- Documenting the damage.
- Mitigating further damage.
- Obtaining repair estimates.
- Communicating clearly and consistently.
- Reviewing all estimates and payouts.
- Ensuring repairs are completed to your satisfaction.
The adjuster will assess the damage, but they won't necessarily find every hidden issue, nor will they automatically get you the best repair quote. You must be proactive, ask questions, and follow up. Think of it as a partnership where you're responsible for your side of the ledger. I definitely felt like I was leading the charge in gathering quotes and ensuring the adjuster had all the information he needed.
Documenting Home Damage for First Claim: My System
After my initial fumble, I developed a more robust system for documenting damage, which I hope I never have to use again, but I'm prepared if I do:
- Dedicated "Disaster" Album: On my phone, I created a specific photo album titled "Home Damage 2022" (and would create a new one for any future incident). All photos and videos related to the claim went directly into this album.
- Timestamped Photos/Videos: Most smartphones automatically add timestamps. If yours doesn't, consider an app that does. This provides irrefutable proof of when the damage was observed.
- Sequential Narrative: When taking videos, I now narrate them. "This is Alex Chen, November 1st, 2022, 10:30 AM. Showing water damage in the guest bathroom, extending from the toilet base to the hallway. Water is saturated up the baseboard here..." This helps tell the story of the damage.
- Detailed Inventory of Damaged Items: For any personal property that might have been affected, I would now create a spreadsheet. Item, brand, model (if applicable), approximate age, original purchase price, and a photo. This is especially important for ACV items.
- Communication Log: I kept a running log in a Google Doc: Date, Time, Who I spoke with (name, title), Method (phone, email), Summary of discussion, Next steps. This was invaluable for tracking my calls with State Farm's claims department, the adjuster, and the restoration companies.
- Receipts in a Digital Folder: All receipts for temporary repairs, dehumidifier rentals, plumber's invoices, etc., were scanned and saved to a cloud folder, and physical copies were kept in a designated "Claims" folder.
Final Thoughts: Understanding Your First Home Insurance Claim
Going through my first home insurance claim was a stressful, yet ultimately educational, experience. It highlighted that even with robust financial planning, there are always new layers of practical knowledge to acquire. My $50,000 debt payoff journey taught me discipline and the power of tracking every dollar. This claim taught me the critical importance of understanding the fine print of my protection and being an active, informed participant in my own financial well-being.
My ultimate takeaway is this: your home insurance policy isn't just a piece of paper you pay for annually; it's a vital safety net. But like any tool, its effectiveness depends on how well you understand and utilize it. Don't wait for a disaster to happen to learn the ropes. Take the time now to review your policy, understand your coverage, and prepare your first time home insurance claim checklist. You'll thank yourself later.
FAQ: Your First Home Insurance Claim Questions Answered
Q1: How long does a home insurance claim usually take from start to finish?
A1: The timeline can vary significantly based on the complexity of the damage, the responsiveness of the homeowner, contractors, and the insurance company, and the state's regulations. For my burst pipe claim, from the initial incident to receiving the final payout (after repairs), it took about 5 weeks. Simpler claims might be resolved faster, while complex claims (e.g., major storm damage, fire) involving extensive repairs and multiple parties can take several months, sometimes even a year or more. Many states have regulations on how quickly insurers must acknowledge a claim and make a decision.
Q2: Should I get repair estimates before contacting my insurance company?
A2: It's generally best to contact your insurance company as soon as possible after mitigating damage. They will guide you on their preferred process for obtaining estimates. Some insurers prefer to send their own adjusters first, who will then provide an estimate, and then you can get contractor bids to compare. Others might ask you to get estimates upfront. Having at least one estimate can be helpful when discussing the scope of damage with your adjuster, but don't delay reporting the claim just to get bids. My insurer, State Farm, advised me to get estimates *after* their adjuster's initial assessment.
Q3: What if the adjuster's estimate is lower than my contractor's estimate?
A3: This is a common situation, and it happened to me. Don't panic. Review both estimates line by line to identify discrepancies. Your contractor might include specific materials, labor, or tasks that the adjuster missed or underestimated. Provide your adjuster with your contractor's detailed estimate and explain the differences. Be prepared to justify why your contractor's estimate is more accurate or comprehensive. It's often a negotiation process. If you can't reach an agreement, you may consider getting a third estimate or, in extreme cases, consulting a public adjuster (though this comes with a fee).
Q4: Will my insurance premiums go up after filing a first claim?
A4: It's possible, but not guaranteed. A single claim, especially for a non-negligent incident like a burst pipe or storm damage, might have a minimal impact or lead to a modest increase. Insurers consider the type of claim, its cost, your claims history, and other risk factors. Frequent claims, especially for preventable issues, are more likely to result in premium hikes or even non-renewal. Always weigh the cost of the repair against your deductible and potential premium increase before filing, especially for minor damages. For my $6,300 payout, my premiums increased by about 8% ($120 annually).
Q5: What is a deductible, and how does it affect my claim payout?
A5: Your deductible is the amount of money you are responsible for paying out of pocket before your insurance coverage kicks in. For example, if your deductible is $1,500 and your approved claim amount is $7,800, your insurer will pay $6,300, and you will pay the remaining $1,500 to the contractor. A higher deductible typically means lower annual premiums, but a higher out-of-pocket expense if you file a claim. It's crucial to have your deductible amount readily available in your emergency fund, as I did.
Q6: What types of damage are typically NOT covered by home insurance?
A6: Standard home insurance policies (HO-3) typically cover "sudden and accidental" damage. Common exclusions include:
- Flooding: Requires a separate flood insurance policy (e.g., through the National Flood Insurance Program).
- Earthquakes: Requires a separate earthquake insurance policy.
- Mold: If it's due to long-term neglect or maintenance issues, though sudden mold from a covered peril (like my burst pipe) might be covered up to certain limits.
- Wear and Tear/Lack of Maintenance: Damage that occurs gradually over time due to neglect.
- Pest Infestations: Damage from termites, rodents, etc.
- Government Acts: War, nuclear hazards, government seizure.
Q7: Should I use a public adjuster?
A7: A public adjuster is an independent claims professional you hire to represent your interests in negotiating with your insurance company. They typically work on a contingency basis, taking a percentage (e.g., 10-15%) of your settlement. They can be beneficial for large, complex claims where you feel overwhelmed or believe the insurer's offer is too low. For my first claim, which was relatively straightforward once I understood the process, I didn't feel the need for a public adjuster. However, if I had faced significant resistance or a very low initial offer, I would have seriously considered it. It's a personal decision based on the complexity of your claim and your comfort level with the process.
Written by Alex Chen, a personal finance writer at WealthSure Lab who paid off $50,000 in debt over 3 years and tracks every dollar of my portfolio.Sources
- Consumer Financial Protection Bureau (CFPB). (n.d.). What should I do if I have a problem with my insurance company? Retrieved from https://www.consumerfinance.gov/ask-cfpb/what-should-i-do-if-i-have-a-problem-with-my-insurance-company-en-1030/
- Investopedia. (n.d.). Actual Cash Value (ACV) vs. Replacement Cost Value (RCV): What's the Difference? Retrieved from https://www.investopedia.com/terms/a/actual-cash-value-acv.asp
- NerdWallet. (2023, November 29). How to File a Home Insurance Claim. Retrieved from https://www.nerdwallet.com/article/insurance/home-insurance-claim-process